
The dice theme continues with #BigDice. Based on an assignment to make five of anything, big dice is was a fun way to get involved with the shop, use of clamps, jigs and power tools.

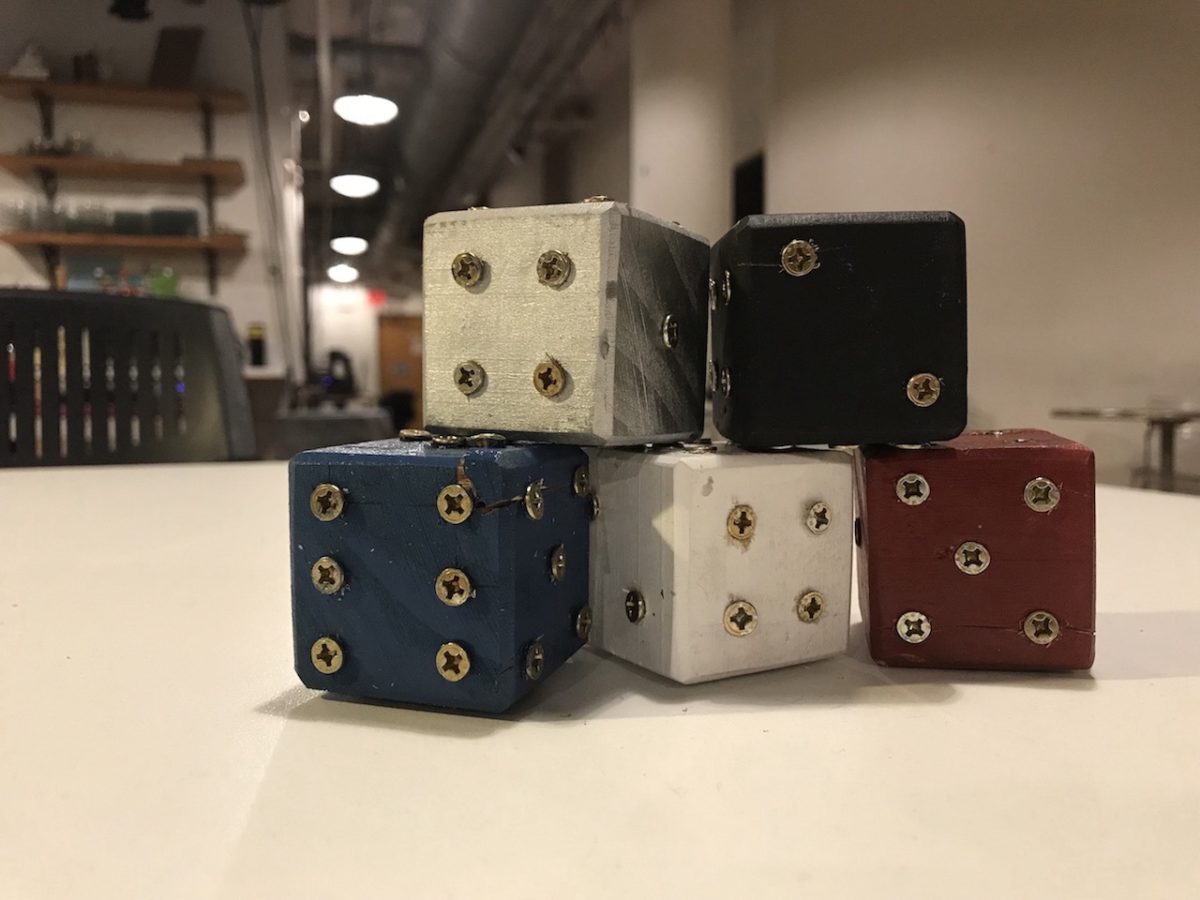
the glam shot 
painting the blocks! 
final product 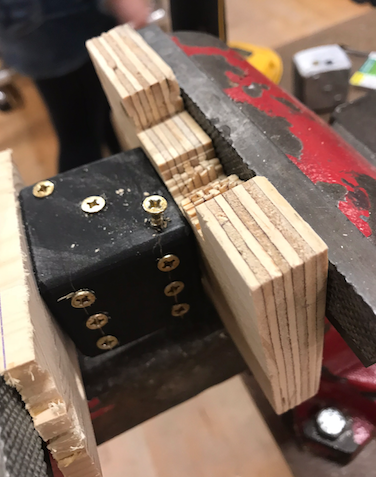
screwing in the “dots”
Holy shit is it hard to make something as simple as dice. What a trip.
While the varying quality of the dice is evidence enough, here is the full journey. Before purchasing any materials, I outlined the design – the material requirements were:
- At least 1.5 x 1.5 x 6 inches of wood. I ended purchasing a 2 x 2 x 36 inch piece of wood from Home Depot. Rule of Pi.
- At least 105 screws for the dots on each side of each die; 6! = 21, and 21 x 5 = 105. I ended up purchasing 250. Also from Home Depot. You never know.
As the final result shows, I wanted the dice to have a few features:
- Screws to represent the dot, steampunk vibes
- Dice of different color
- Rounded edges for a more real dice feel …and so that I can use the sand belt
In order to do this I determined the following order of operations. Six steps for a six sided die. HA!!!!!
Six steps for a six sided die
Measure the wood to make cubes
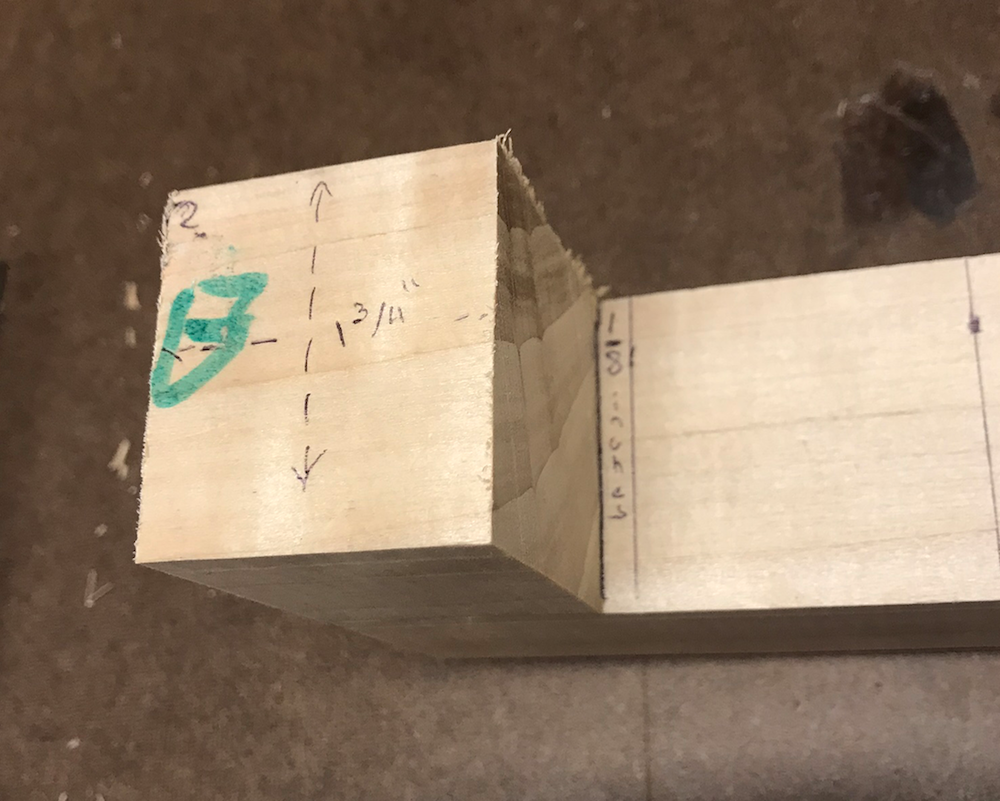
Well it turns out “2 inches by 2 inches” actually means more like “1 and 7/8ths inches by 1 and 7/8ths inches”.
Check the actual dimensions of your wood this before making any marks! Then mark it up!
Cut the wood into blocks
After making marks on the wood, it was time to cut it! Because the material was around 2 inches thick, I opted to use the circular saw.
This is where I ran into my first problem! I neglected to take the width of the saw into account. When I made my first cut, it was clearly shorter than it should have been.
For the next blocks, I took the 1/8th inch thickness of the saw into account. Lesson learned.
Measure and draw the dots
Keeping in mind that I would be sanding off the edges of each side, I created an outline of what grid lines should be drawn:
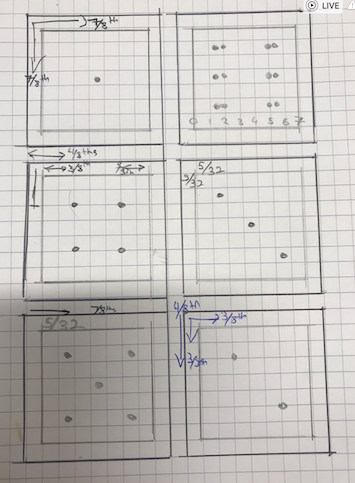
Based on the outline I measured and drew the grids on the dice. This sucked and was very time consuming.
Next, sand the edges
This was the most error free and fun part of the whole thing. I turned the harsh corners into somewhat rounded ones with the band sander.
Perhaps it could have been sped up by drawing the lines when the wood was in one piece, but it probably would have lacked the precision needed for each die. Even at the unit level, it wasn’t that precise.
Paint the things
The nice dice were ready to be painted. I painted them in a few different colors, with various levels of success.
some enamel, some acrylic 
painting the blocks!
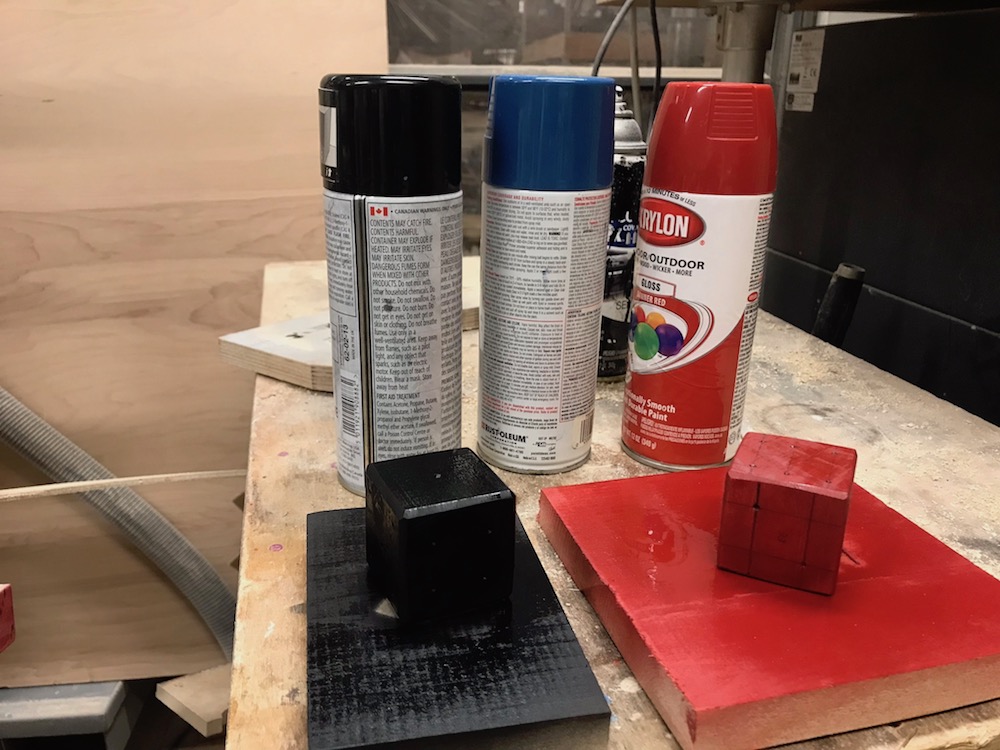
It turns out different types of paints are absorbed into the wood and dry in different ways… lesson #3.
Drill screws into the dots
I started with a clamp setup for this and drilled what felt like a million screws into the dice. This also sucked and took forever.
I first punctured the dots using the very-handy spring loaded center punch. This went off without a hitch.
On the very first die, I ran into a problem with the spacing of the dots. The corners were too close and touched like this!

But after adjusting by just a few parts of an inch, they no longer intersected. Lesson number three!
This is where the more bad news happened. The impacted screws were not the only thing to cause destruction.
Even after adjusting the outline, the screws that were closer to the edges of their side (namely on the 3, 5, and 6 sides) created serious cracks in some of the dice. So sad.
A few ideas on what may have caused it to this:
- Not the best screws for the job? I noticed these ‘construction screws’ didn’t get as flush with the wood as some of the wood screws of the shop
- The wood, or the grain of the wood? It seemed like splintering only started when screws were close to the edge. Maybe I should have drilled out more material with more than a XX press thingy
- Use of power tools to drill the screw? Maybe its too intense or something… no way I would ever do that by hand though!
One reply on “Big Dice!”
Nice work. The screws as dots is a nice element. I wouldn’t have thought about the screws running into each other until they did either.
A few suggestions that might have helped. If you printed out a template of your hole placement, you wouldn’t have had to measure the holes on each die. You could have just placed the paper template over the wood and punched the mark.
The reason the wood cracked is probably because you didn’t drill pilot holes for the screws. You could set up a simple jig on the drill press and drilled your pilot holes very quickly. The screws would screw in easier and there would be a lot less chance of cracking.
Glad you gave them a paint job.